|
|
Post by justyfied on Aug 5, 2011 11:30:28 GMT -4
Okay, I guess it is my turn for a build thread, Just do not expect this to to be completed overnight. I want to use one of my damaged and partially parted out Justy's as a Winter runabout/Auto cross racer. Might even try frozen lake ice racing with it. I don't have a picture of the actual car so here is a similar one. Except for paint color and the cloth on the seats the 1990 and newer ones are all the same anyway. 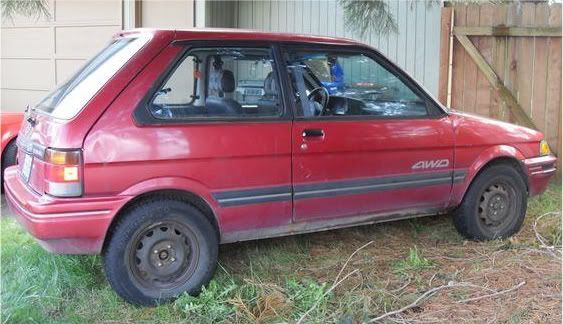 I was thinking that this would be a good choice for a source of nice even lag free boost: 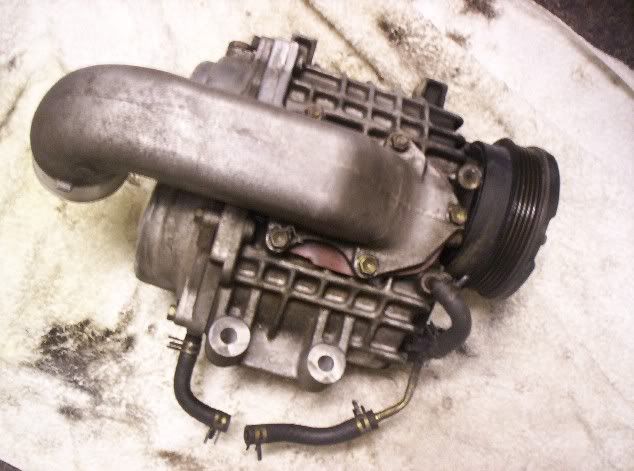 It is called an SC12 blower, Rated at about 1200CFM and is fitted to the Toyota 1600cc 4A-GZE stock. I have the complete EF12 carburetor engine left over from my 88 EFI conversion, so I will be using it as a mule. That way once I get it running I can start a proper rebuild of an engine suited to high boost. Of course that means that I will have to make a adapter for the drive shaft support on the post 89's 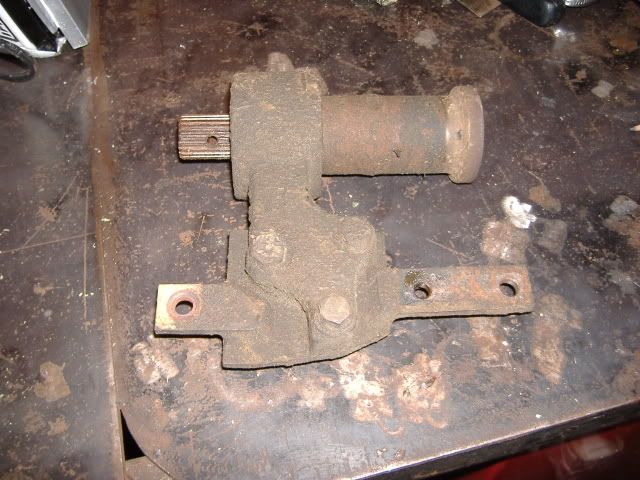 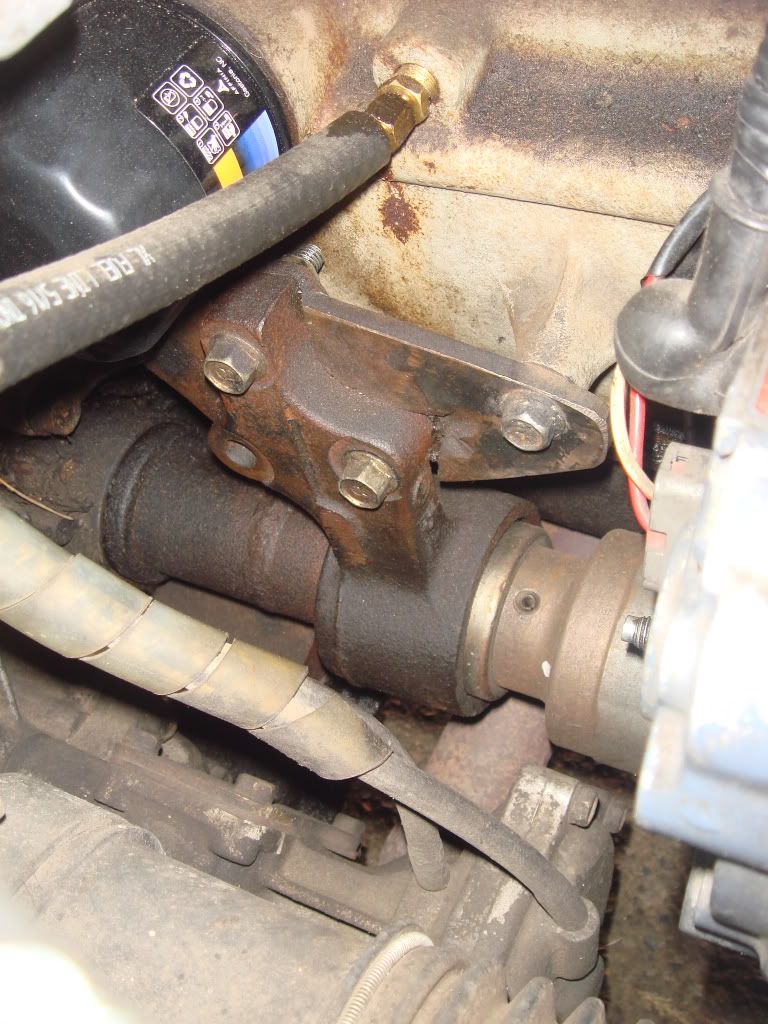 I had 2 spare flywheels machined down, one for the mule and 1 for the good engine. 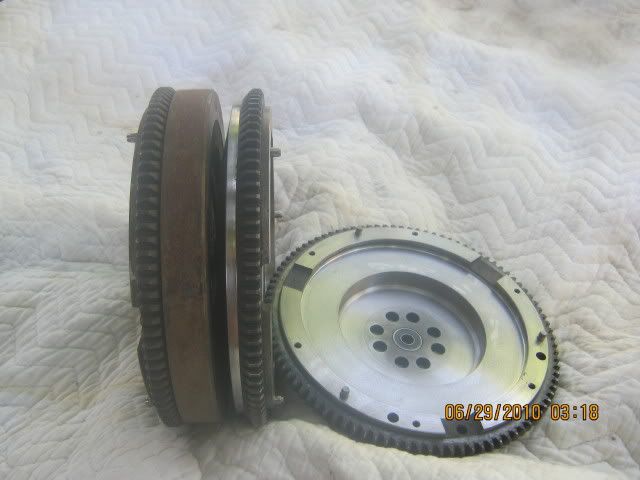 Part of the reason that I will be using a carbed engine is because I want to make this a supercharged now Turbo, intercooled and then blow through Propane fuel setup. This way I can eliminate all engine controls except for the ignition. To cover that I plan on adapting a junkyard electronic distributor that I can re-curve myself. |
|
|
|
Post by justyfied on Aug 7, 2011 10:47:06 GMT -4
Not all of the Justys I have are complete or even worth fixing, This is what is called a parts car. I have a 4 door standard trans Justy that is my std trans parts car. I bought it with no radiator or battery and oddly no tires and wheels. I paid $50.00 dollars for it because it had had what seems to be a common engine type of failure. The oil pump was worn out, there was insufficient oil pressure. The number 3 con rod bearing spun. The #3 con rod broke off the crank and hit the balance shaft and forced it out through the side of the block under the exhaust cat. converter. I found a 2 inch long piece of the balance shaft sitting on top of the sway bar. The car had been in a previous accident and even though it was red they used a green grille and bumper. Along with the rust it made for an ugly duckling. Maybe that is why they did not care and filled the inside of the car with sunflower seed shells after eating them!
Okay, now I feel JUSTYFIED in killing this car so that another more worthy Justy can live again.
I think it goes by regions but around here, from what I can see. The majority of Justys sold were 4 door ECVT, then 4 dr Std. 2 doors are rare and a 2dr std front wheel drive would be the rarest, Most were 4 wheel drive.
Most of my plans for a Justy in the future involve some sort of racing so I prefer a 2 door Std trans car. 2 door cars especially a unibody frameless car are stiffer and liter than a 4 door or a convertible car.
So yesterday I removed the wiring harness from the firewall and the dash as it has to be removed to accomplish this. I need the harness for this build as the 1 in the 2 dr. car is cutup and damaged in many places. I do not trust a bunch of repaired wires and would prefer a virgin factory wiring harness.
I Will also need to remove from the parts car:
Front sway bar and mounts.
Shifter and linkages.
Emergency/park brake handle.
Fuel tank and complete tri fuel lines from inside the car.
All of these parts were removed by the previous owner and will need to be replaced.
As stated earlier Iam going with Propane as a fuel which uses a specific to Propane fuel tank and lines. However I think I will go ahead and replace the gasoline fuel lines before I replace the dash. That way I can always restore the car to gas in the future if I want.
|
|
|
|
Post by justyfied on Aug 9, 2011 15:23:30 GMT -4
So this Weekend I took out the complete wiring harness from off the firewall and under the dash of the 2 door car. There are just a few tricky parts if you have never done this job before. There is a small fuse box right beside the Brake booster (Left hand drive steering). the inside screw holding it on is slightly easier to remove after removing the other one first, then swiveling the fuse box up around the back screw. Then you can see it and access it with either a very long Phillips or a short offset screw driver. It looks like a Z. Then you can take off the wires for the twin water pumps for windshield washer fluid. Remove the reservoir and pull the clear hose up through the boot in the firewall close to it. There is a plastic hose barb in this line right about where the hood release handle is in the car. This should give you a short piece of hose that you can leave attached to the reservoir on its side, then remove the orange colored hose from the res. and quickly attach the clear hose where it was. This plugs up both sides of the tank for storage till you are ready to reassemble. 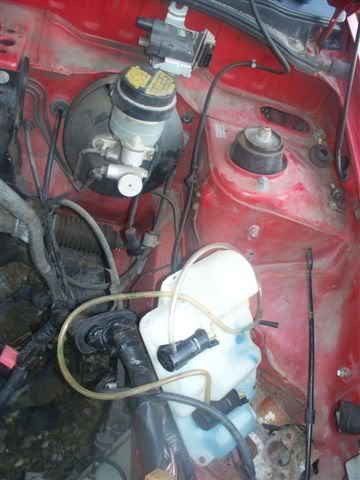 Just ahead of the res. beside where the long ago removed battery is a box bolted to the inner fender for the headlights. Unbolt this, do not try to disconnect it! Follow all the wires from the boot down to wards the front of the car and disconnect the plastic wire mount barbs, and bolted on supports or grounds. Remove the side marker lights from beside the headlights to remove the bulb holder from the back of the lens. Also do this to the headlights. Also the lower lights in the front bumper, access from inside the wheelwell by pulling on the plastic inner fender. Remove the horn to disconnect it. Then you have to remove the grille to get access to the hood mechanism. The mechanism has to have the 3 bolts holding it on removed so that you can flip it over and disconnect the hood release cable. Just push the cable out and then it will flip out and off of the very end. Once the hood cable is off the mechanism I wiggle the grommet out of the rad support and slide the cable through this hole. You have to pull the hood release cable into the inside of the car right through the boot on top of the firewall. Then the computer and other cables can be disconnected inside, and the entire wiring loom with the boot can be lifted up and out of the firewall. (Sounds easy but there is some yanking and strained pulling to do this!) On the other side it is the same but easier, you have to unbolt the windshield wiper motor, but do not remove! just swing it up for more room.In this picture you can see that the boot is covered by the motor and that is why it is swung away. 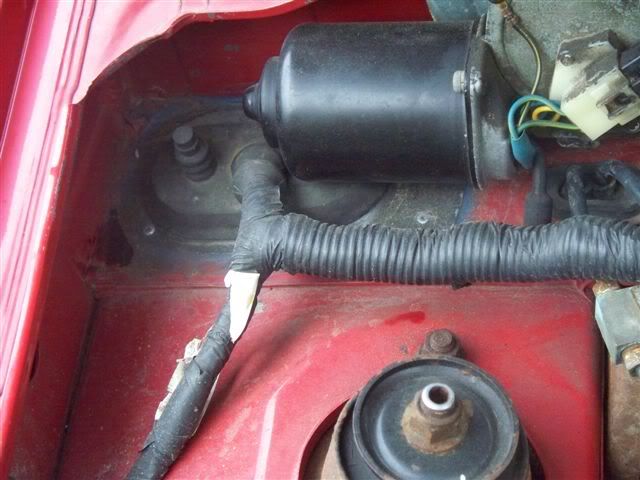 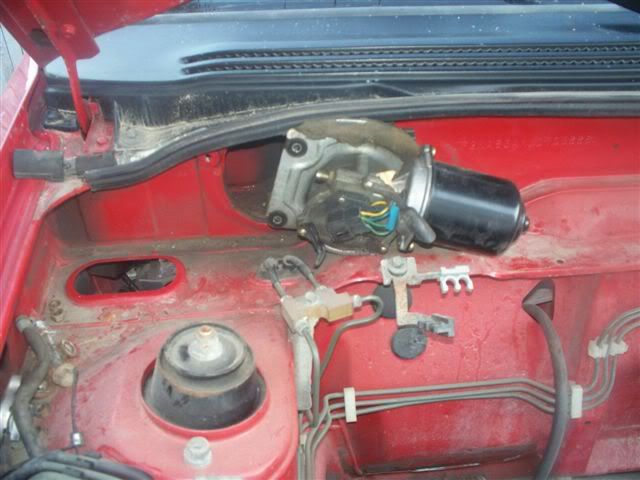 There are not as many connectors and it is easier to remove the entire blower squirrel cage housing, The dash is out right? 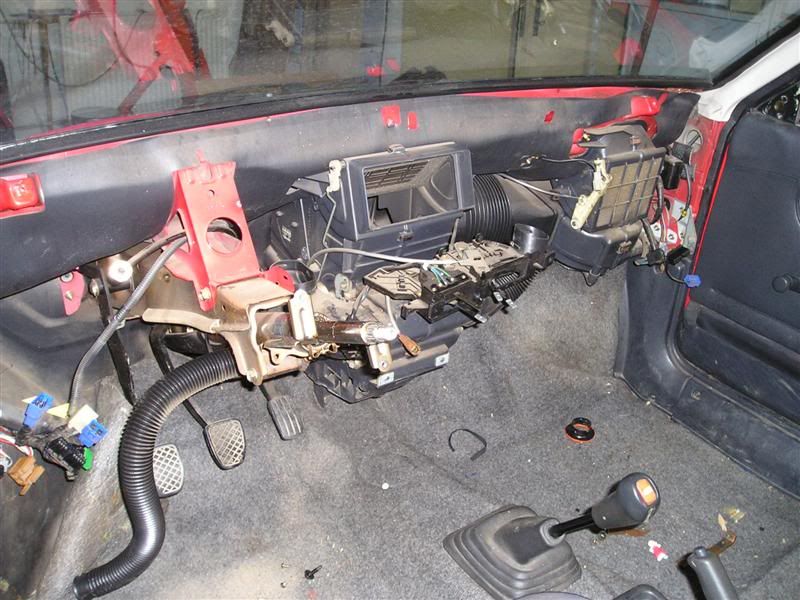 More on dash removal later! I will see if I can get around to posting some relevant pics for all of this. |
|
|
|
Post by justyfied on Aug 29, 2011 15:11:32 GMT -4
Progress is slow, But I did bolt the Carbed Engine and Trans. together this weekend. That sounds easy but I had to get that Engine out of the shed and drag it over to the car. Then I put on the nice litened flywheel. I put a little dab of what is called Loktite thread compound on the bolts before tightening them up. The way the bolts are spaced on the Justy crank to flywheel there is little room for a thick walled socket. I had to use a deep 14 mm 3/8 drive socket with a 3/8 to 1/2 adaptor to the wrench. I know that the only way to take these bolts off is with an airpowered impact gun. So that is how I put them back on. Much easier than propping up these short narrow but tall engines. To torque up the bolts to spec would require some means of stopping the engine from rotating also. Using the impact gun is so much easier and it worked for me on another Justy engine swap. Then I looked at my 2 stock used pressure plates and decided on one that was mildly rusty, but in otherwise good shape. All it took was a little sanding by hand with some sandpaper cloth (Emery cloth). In the picture it is finished on the right side only. 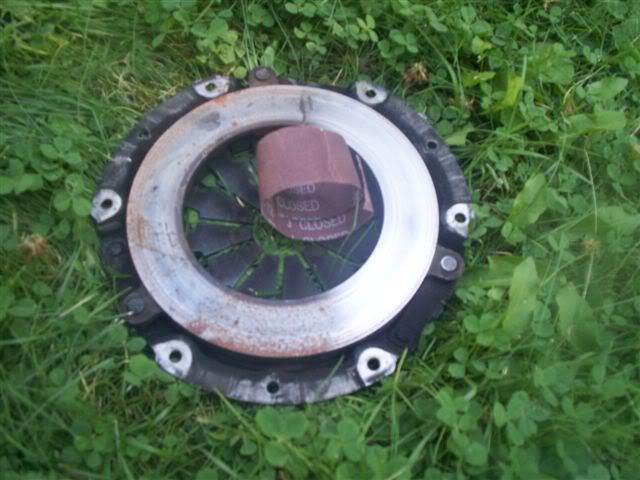 I bought a new clutch disc off of Ebay awhile back, couldn't figure out why it was such a good price so I only ordered 1. Now I wish I had ordered 3 or 4.  The reson it was cheap was because they knew they would fit the Justy like they advertised but the box says something else. 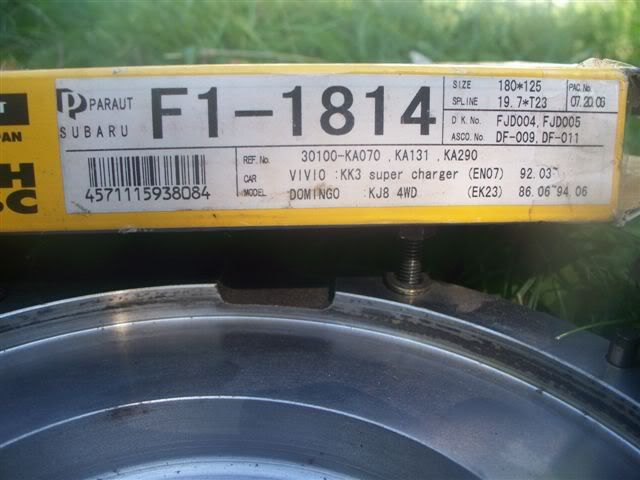 That is the side of the box on top of my litened flywheel. Feeling like Iam lucky Irish so I took the pics ontop of some Clover!  The only thing that is different is the flywheel side of the splined center hub is longer. A good thing as it gives it more metal to transfer power to the trans imput shaft. Plus 4 springs instead of 3. The Vivio disc is on the left with a stock Justy disc on the right. 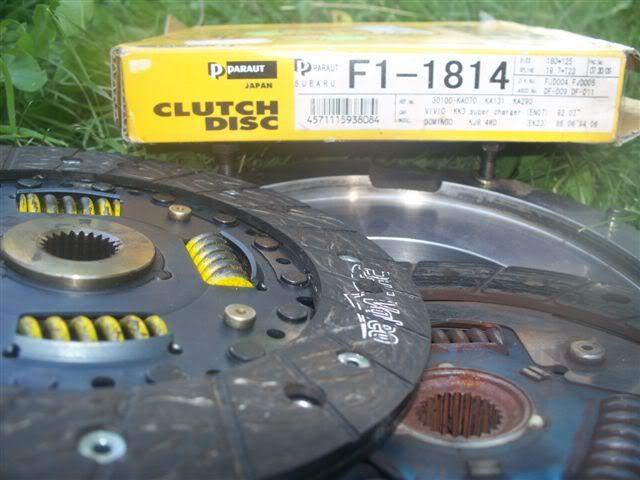 I do not own a clutch alignment tool to line up the clutch disc when bolting on the pressure plate. So I get the pressure plate started on the flywheel and using a long punch in the pilot bearing hole I adjust the disc till it looks good to the eye. ;D Then slowly and evenly tighten each one of the pressure plate bolts up a little bit at a time in a circle till they are tight. This next trick is good but it might be best if you have a friend to steady things: To mate the Transmission to the Engine I put the Engine on its nose on top of a tire with no rim. (Best to remove the dipstick from its tube so that you do not break the plastic handle!) Then pick up the Trans and lower it down over the cluch/flywheel till it mates up flush. Have your bolts and a wrench handy.  Hopefully you were able to find the bolts (3 different lengths) for this from when you last took the parts out of the car. What I try and do MOST of the time is to put a bolt back into the hole it was threaded into once something is removed. That way you are not scouring thru bolt buckets and old tranny/ engines for your 1 bolt that is missing.  |
|
|
|
Post by justyfied on Oct 9, 2011 23:27:36 GMT -4
Just an Update for now. I recently purchased at the wrecker, a 2BBL Holley adapter plate. It was an excellent homemade carb adapter That is solid aluminum and will be relatively easy to re drill to any bolt pattern. This way I can have it bolted onto the stock Justy 2BBl intake. I got it off of a Chev V6 powered X11 which is G.M.'s idea of a small front wheel drive car. This adapter is a small piece of metal which is a big piece of the puzzle of this project. Another big part of this project is the parts needed to mount some instrument of making boost. While I would much rather have a Roots type Supercharger of some sort, Turbo's are much more common. I have learned that the SC12 blower I was looking for is getting hard to find and thus expensive. I do however have 2 nice turbochargers from a Subaru XT and an Imprezza. Now that I had the good fortune to be able to buy this fabricated turbo manifold for the Justy, I have decided to go for a Turbo instead. 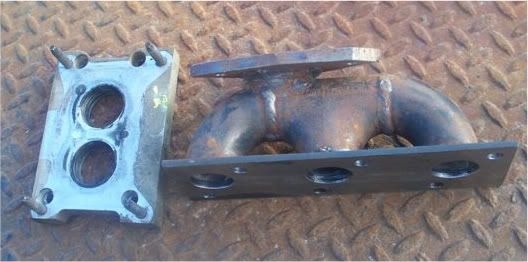 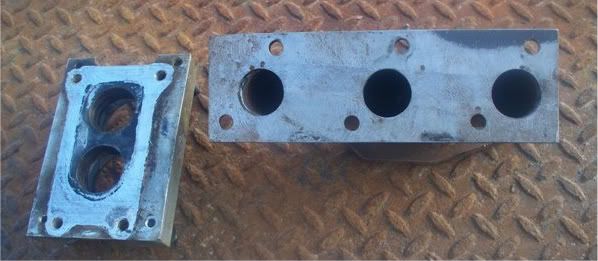 |
|
cpc
New Member
 89 Sherpa RA
Posts: 45
|
Post by cpc on Oct 10, 2011 5:30:07 GMT -4
So what turbo will you be using? What model?
CHris.
|
|
|
|
Post by justyfied on Oct 11, 2011 0:15:56 GMT -4
Chris: I was busy with family stuff today and didn't get a chance to take a pic of my turbo's. So here is a pic to get your attention  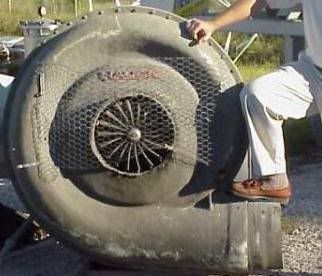 |
|
|
|
Post by justyfied on Oct 13, 2011 15:10:03 GMT -4
Turbo's you want to see,  We got Turbo's: 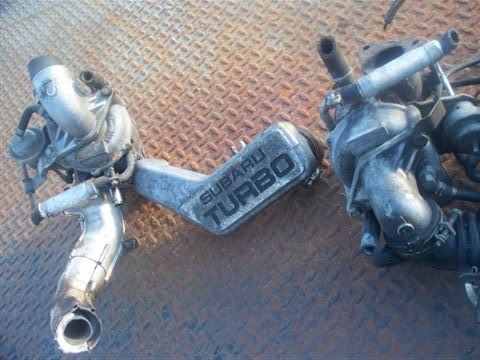 That is a pic. of the same type of turbo: IHI RBH5 that came on 2 different older subie cars, one was an XT and the other I think some sort of wagon imprezza type thing. They had some cool turbo to intake manifold cast Aluminium pipes with "Turbo" cast right into them . So I hope to use the one pictured or another one like it.  |
|
cpc
New Member
89 Sherpa RA
Posts: 45
|
Post by cpc on Oct 15, 2011 1:38:38 GMT -4
Wow! That looks like a turbo, only smaller ;D Just kidding.
Any idea of how this will spool up with the (significantly) smaller Justy engine? While you're in there you could plumb it for nitrous to overcome any problems.
Chris.
|
|
|
|
Post by justyfied on Oct 15, 2011 12:36:24 GMT -4
Wow! That looks like a turbo, only smaller ;D Just kidding. Any idea of how this will spool up with the (significantly) smaller Justy engine? While you're in there you could plumb it for nitrous to overcome any problems. Chris. Yes I have heard how the Import Drag racers get a relatively huge turbo to spool with nitrous. This turbo is not that big and is really just right for this engine for a street driven application. I have heard of someone who used the same size turbo with the same build style of exhaust manifold on a 1.2 Justy on the Street. He reports that it is very street able however it makes enough power to require a better clutch. Remember that Turbos used by Original car manufactures are usually tuned to make about 5 to 7 Lbs of boost and only up the horsepower a little bit. That is why getting these turbos from the wrecker to use on a smaller engine is so good (especially if you are cheap like me!) ;D I have read how there are turbos this size on 750cc motorbikes on the street! |
|


 We got Turbo's: